Welcome New Member to the site!
In this article we will discuss:
If after reading this, you have questions, please sent them via our contact form
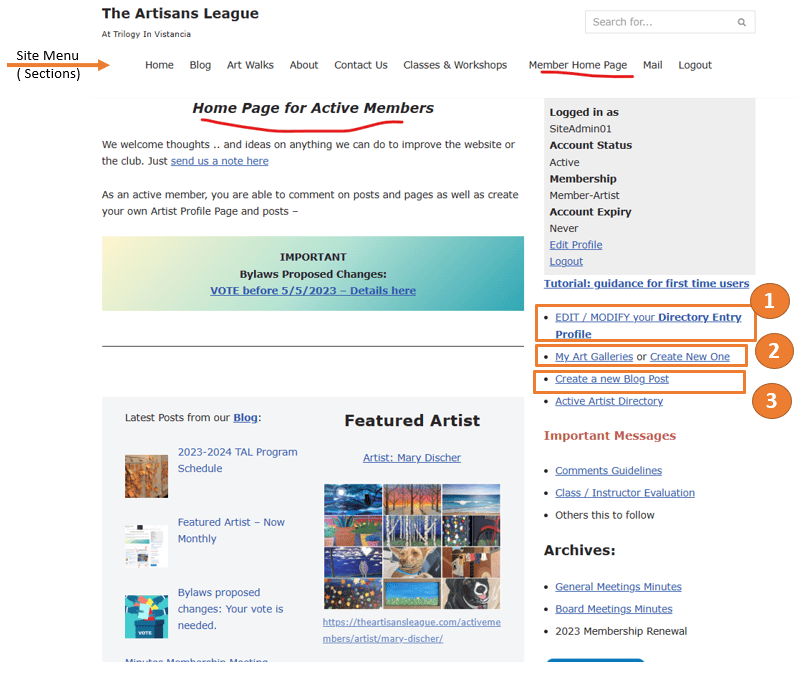
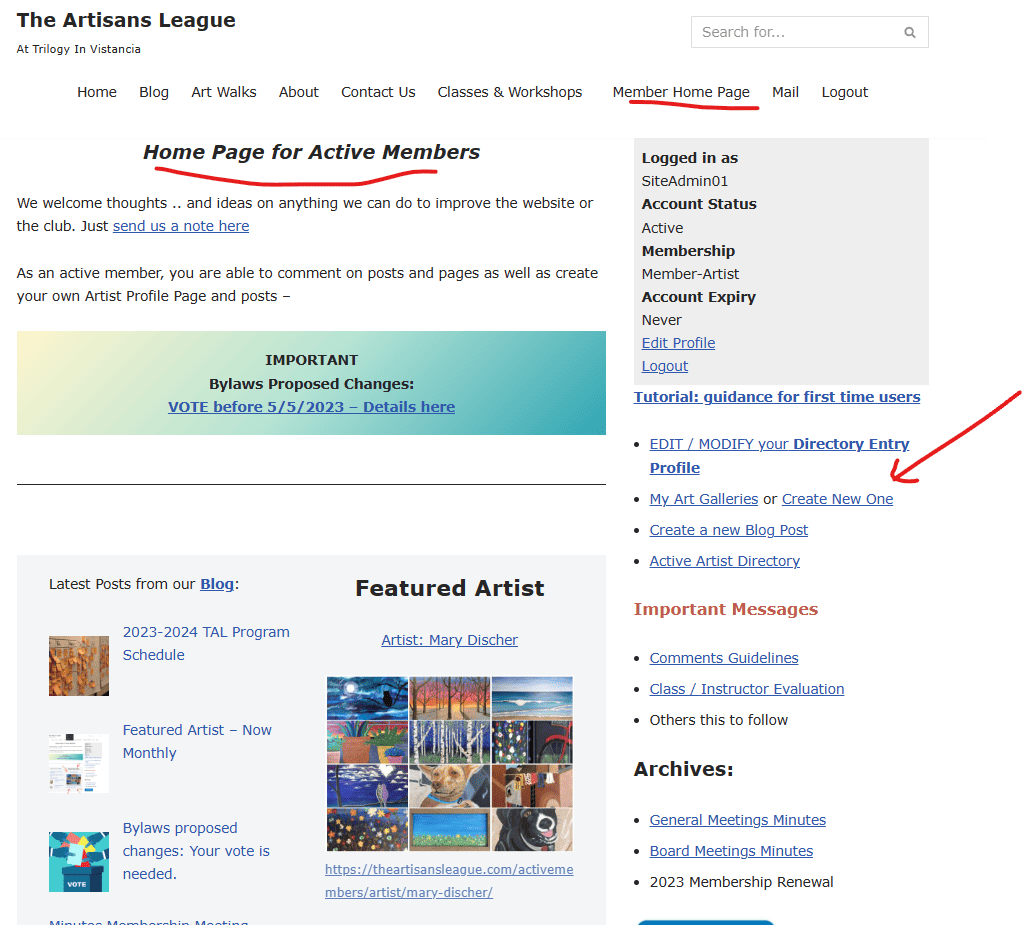
Members Home Page
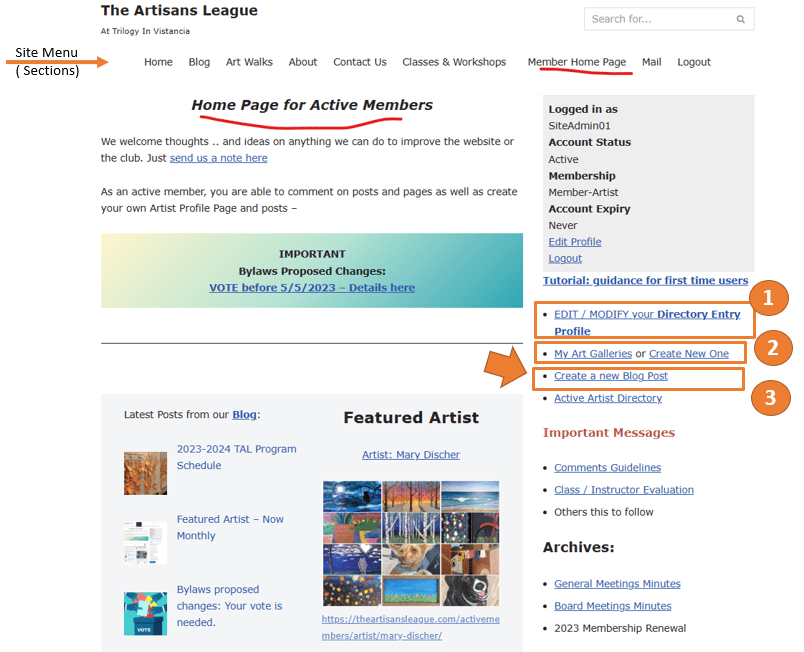
The first thing you will see after you login is the member’s home page.

The Member’s Home page will change from time to time as new information is brought forward to the membership and new artists are featured. Always take a look at the Important Messages section of the page for upto date communications.
What to do next?
Explore the site! –– Check out the blog and the content available to members. It will get better over time with all of us contributing and communicating!
When you are ready, come back to the Members Home Page (in the menu section) and let’s fill the 1) Artist Directory Entry and 2) create your first Blog post
Artist Directory Profile
It is recommended that all members artists create a Directory Profile Entry. This will show your information in the Active Artist Directory which is currently available to members only —
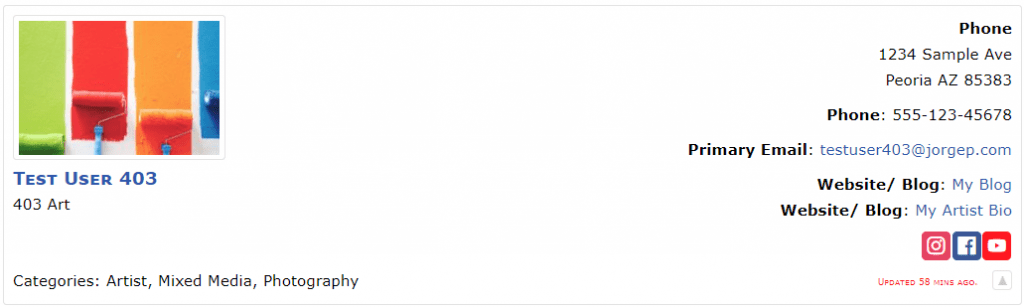
Although the look may change it a bit, your directory entry will look something like this:
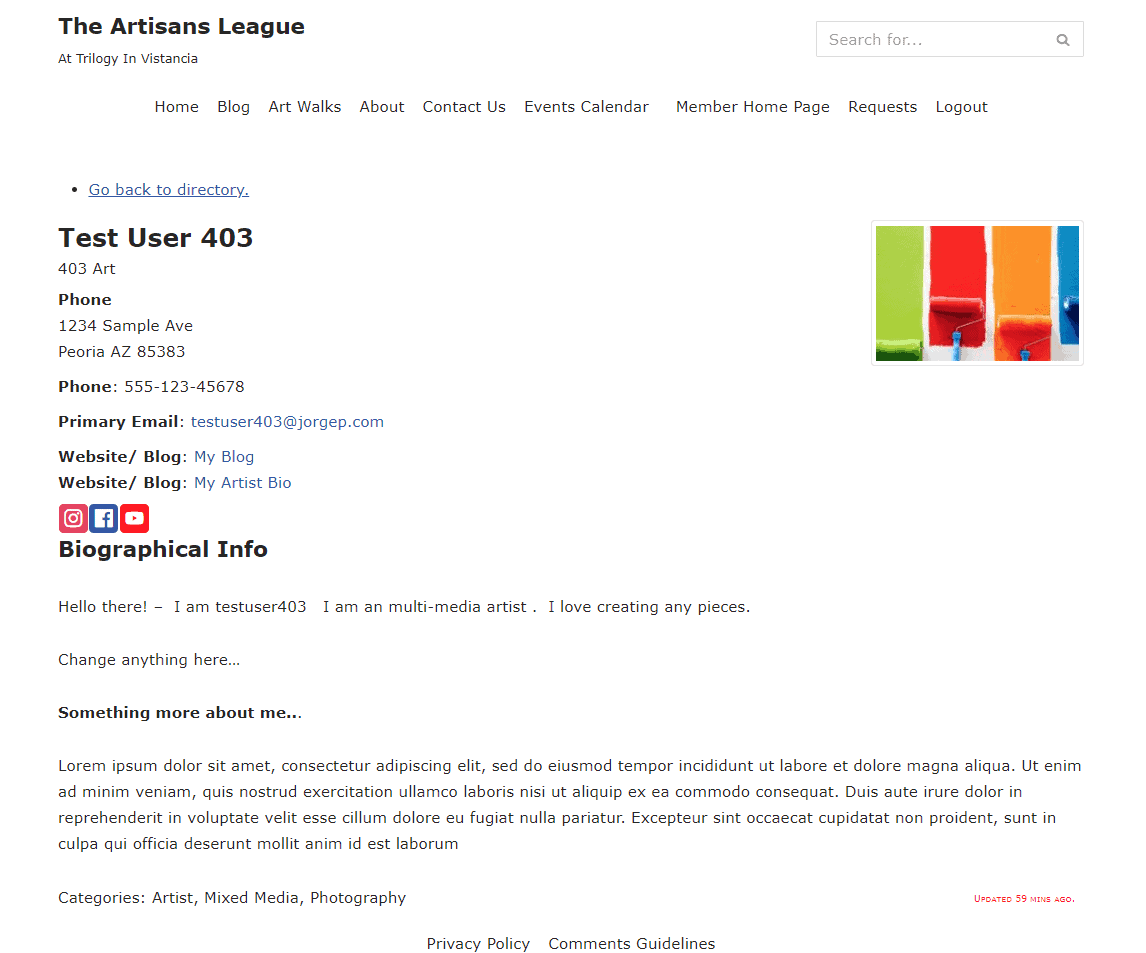
and when a user clicks on it, it will show the full page:
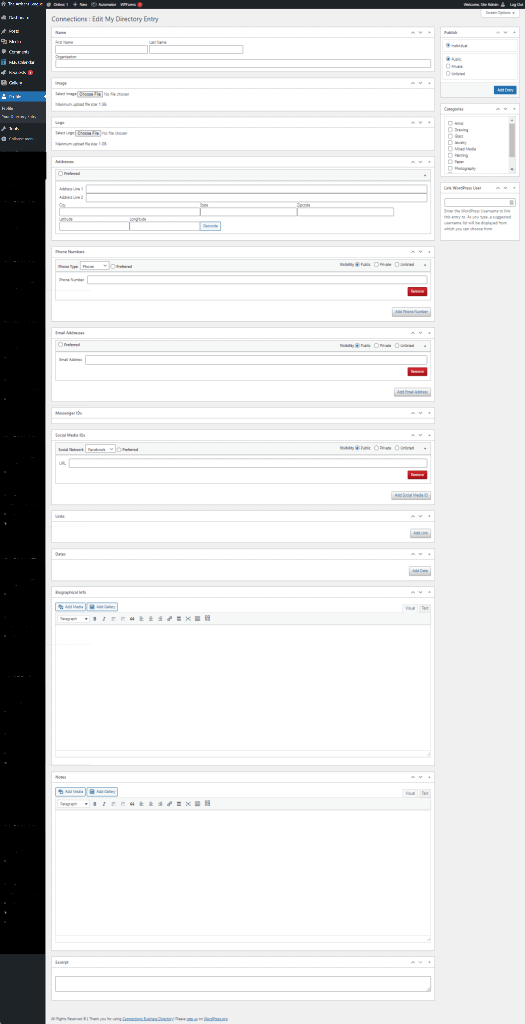
1) Creating Your Directory Profile Entry
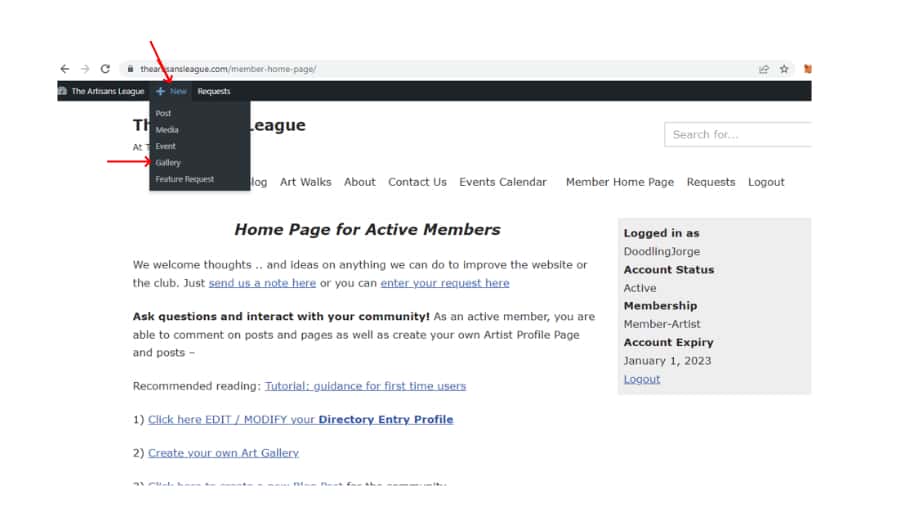
To create your directory, go to the Members Home Page and click on Click here EDIT / MODIFY your Directory Entry Profile

You will be presented with a form asking you for basic information, photo, sample work social media and your bio information.
Please note that all information is optional. Enter what is comfortable for you for other members to see – Remember the listing is only available to other members!
Photos and Images need to be in JPG or PNG format (no HEIC format is supported).
You can change and update your Directory Profile information at any time.
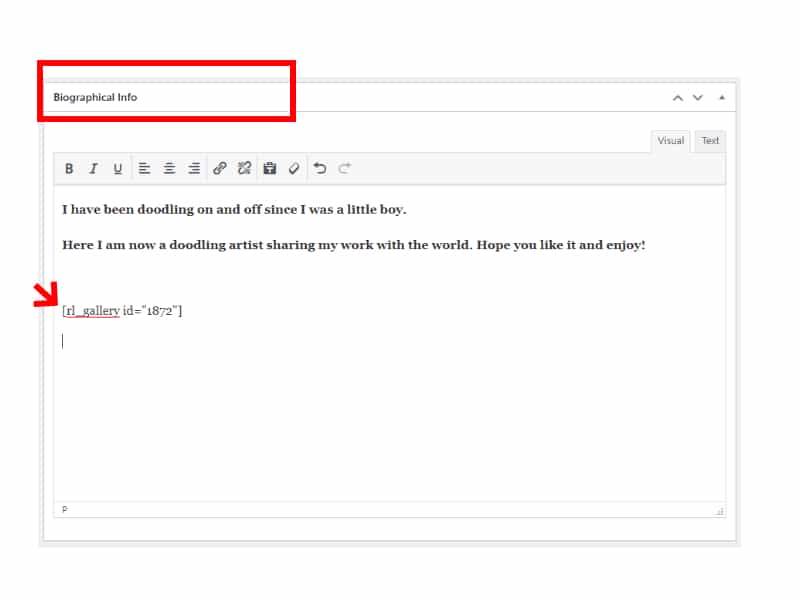
Scroll down to the Biographical Info field and type some words about yourself so it will appear on the Active members Directory
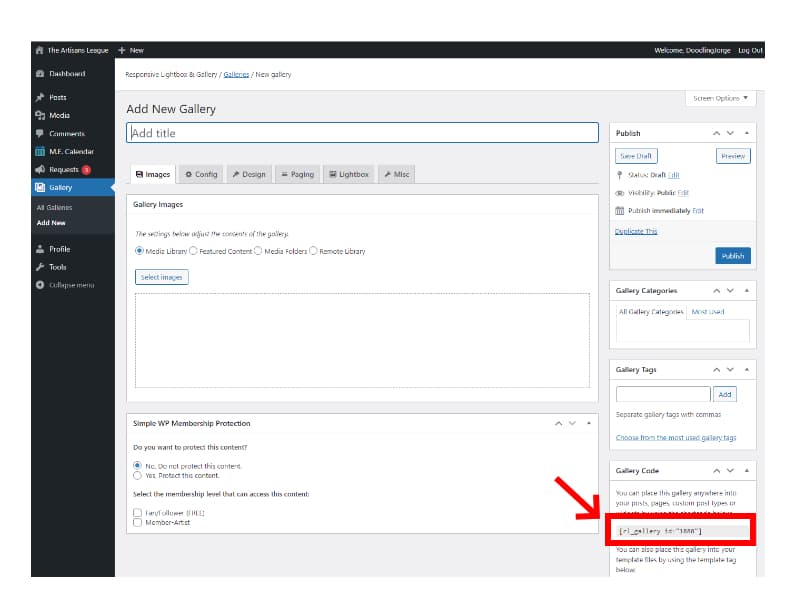
2) Create your own Art Gallery
What better way to show other members your artistic talents than placing a few photos of your art and displaying them. It is super simple!
- Click on Create your own Art Gallery
- Enter your name in the Gallery name
- Drag and drop from your computer one or many pictures as you would like (JPG / PNG format only)
You can always add or remove any pictures in your gallery as you want.
if you have different art forms you can create multiple galleries for the different mediums you have.

Do not forget to Save / Update the Gallery when you make changes!
Adding your Gallery to the Active Members Directory Entry
This is optional (but recommended step):
Make a note of the Gallery Code on the right column of the page. You will
Now that you have your own art gallery, you can add it to your Directory Entry by adding the short code the biographical info field
Save / Update your Directory Entry and then you can go to the active members page and see your entry with your art.
3) Create your first Blog Post!
Your first blog post should be an introduction of yourself to the community – no forms to fill, no preset formatting. Make it your own! You have a blank page / canvas – Go back to the Members Home Page and click on create a new Blog Post
You will be presented with a blank page in which you can write to your heart’s content, add images of your art and format it any way you want.

If you are not familiar with the WordPress editor, you can check this post on how it is done.
That is it! for this overview tutorial – hopefully it was simple enough. ifyou have questions, please sent them via our contact form
Happy Blogging!